
Sell print-on-demand products with Printful or Printify
Connect Printful or Printify, bring in the products you designed there, and approve your paid orders. The printer makes and ships each one, and Payly emails your customer the tracking.
Print on demand means nothing is made until someone buys it. You design your products in Printful or Printify. When a customer pays, the printer prints the item, ships it to your customer and charges you its price. You keep no stock.
You need a Printful or Printify account, with your products made there.
Connect Printful
- In Printful, go to Stores. Payly needs a store of the type Manual order platform / API. If you don't have one, add it. Payly brings in the products from that store.
- In your site dashboard, click Integrations.
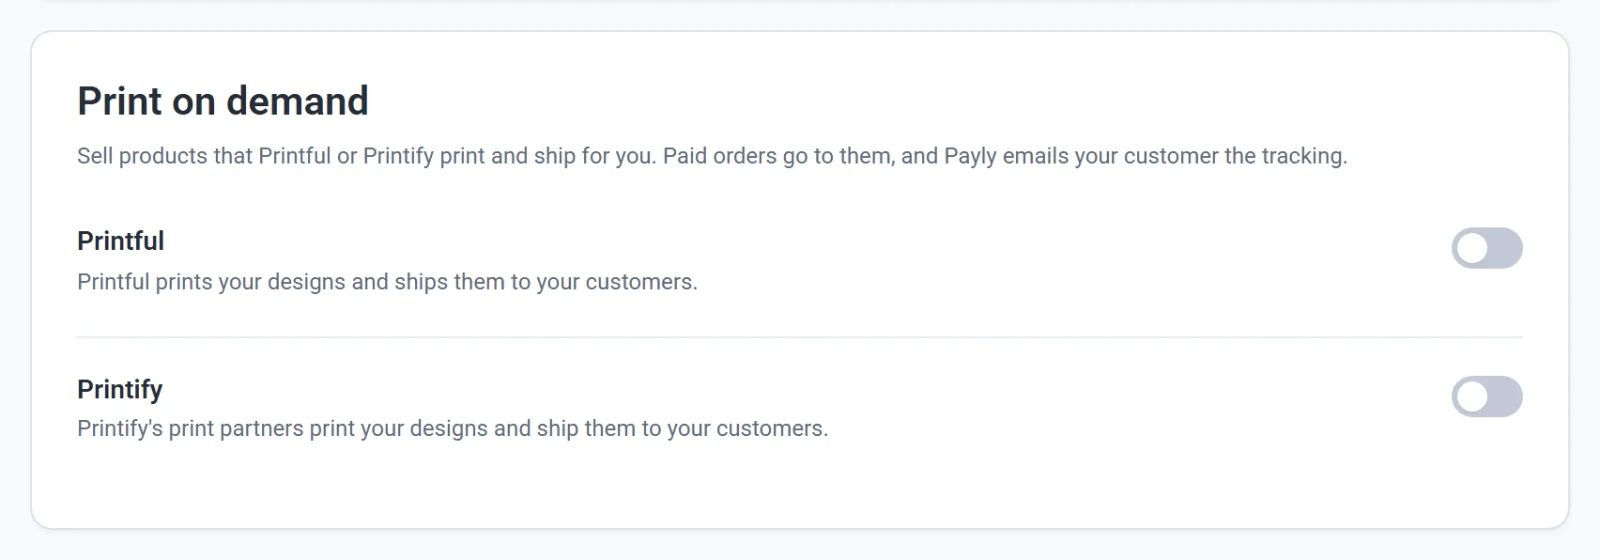
- Under Print on demand, turn on Printful. A pop-up opens with the steps.
- Open developers.printful.com/tokens/add-new-token. If it asks for a store, pick the one from step 1. Select these scopes:
- View and manage orders of the authorized store
- View store products
- View and manage store webhooks
If it asks for an expiry date, pick the latest one.
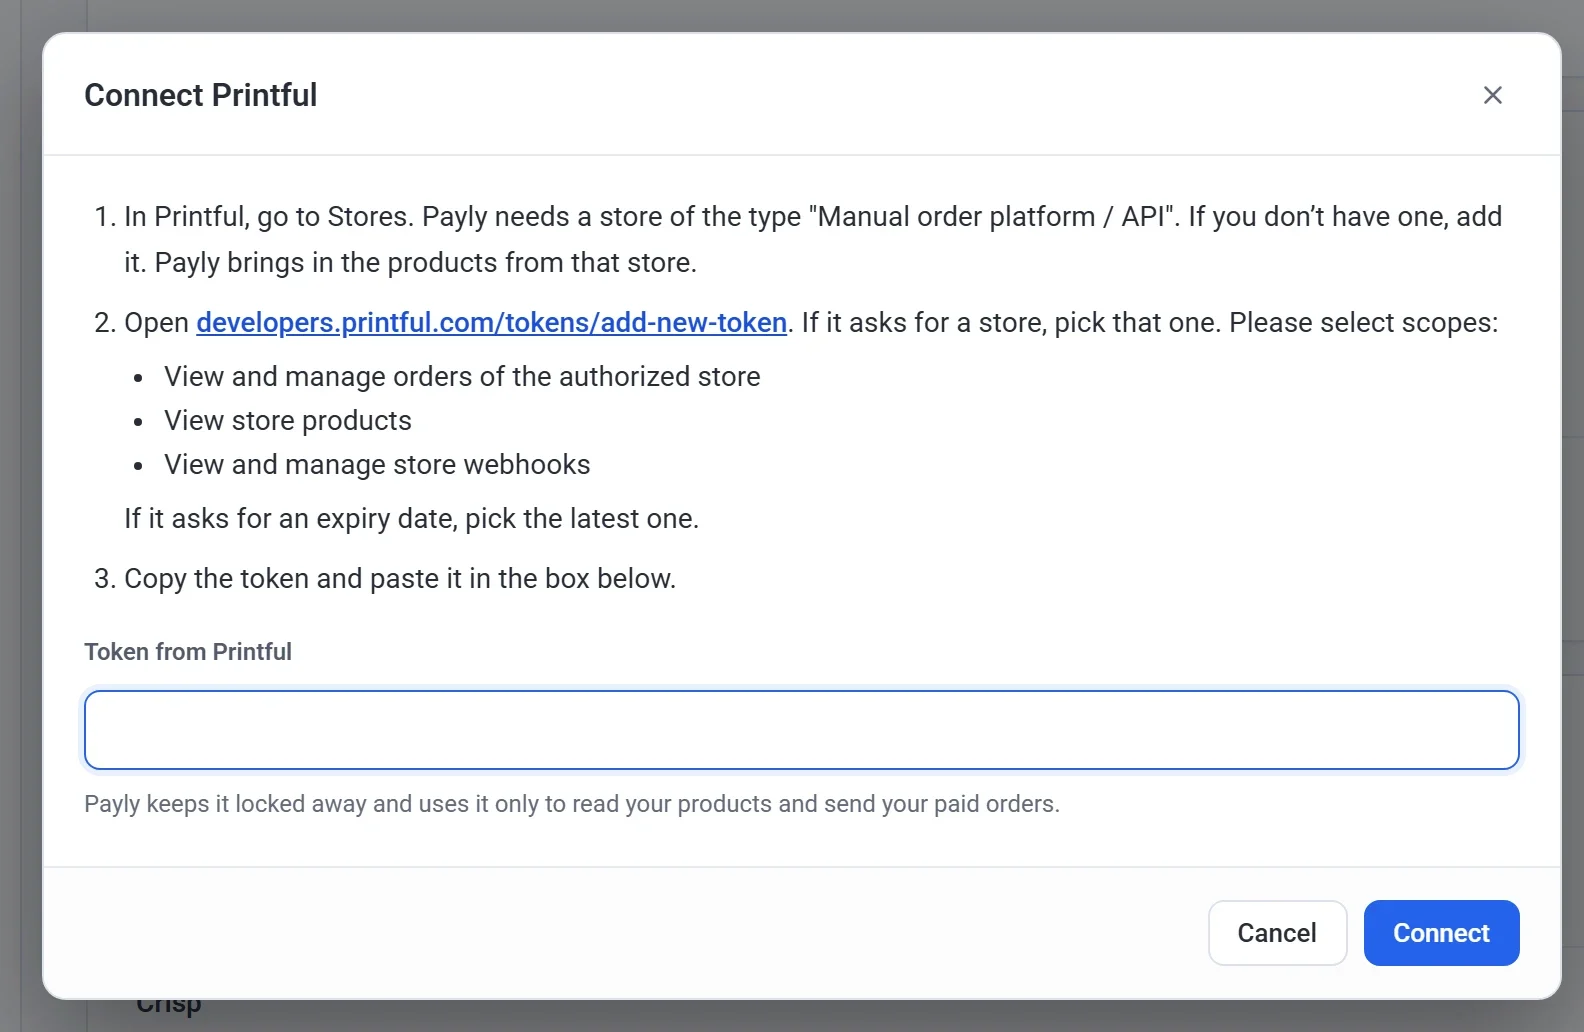
- Copy the token, paste it in Token from Printful and click Connect. Printful's settings open.
Connect Printify
- In Printify, pick the store you'll sell from on Payly. Use a store that isn't connected to Etsy, Shopify or another site. "My new store" is fine. Payly brings in the products from that store.
- In Integrations, under Print on demand, turn on Printify.
- Open printify.com/app/account/api and generate a new token. Select these scopes:
- shops.manage
- shops.read
- orders.read
- orders.write
- products.read
- products.write
- webhooks.read
- webhooks.write
- Copy the token, paste it in Token from Printify and click Connect. If your token reaches more than one store, choose yours under Printify store and click Connect again.
Printify tokens last a year. When a token stops working, the Printify row says so. Click Settings, then Use a new token.
Choose how paid orders go
- In Integrations, click Settings under Printful or Printify. It also opens by itself right after you connect.
- Under Paid orders, click one:
- Wait for my approval (the default): approve each order on the Orders screen. The printer charges you only for the orders you send.
- Send them to Printful right away: each order goes to the printer as soon as it's paid.
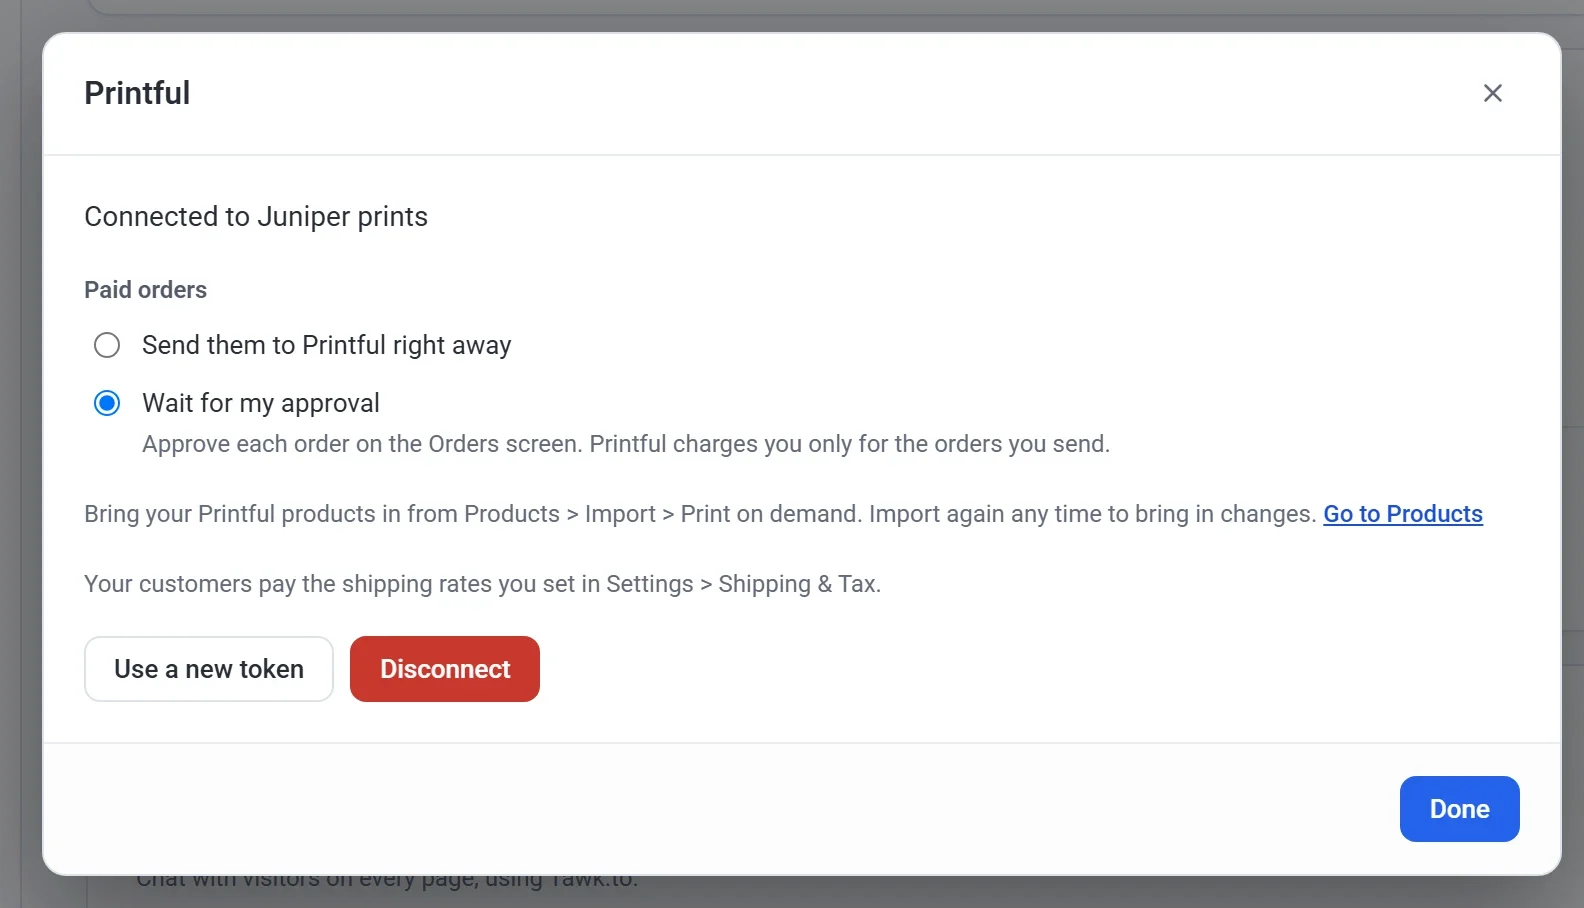
Your choice is saved as soon as you click it.
Bring in your products
- Click Products, then Import.
- Click the Print on demand tab, then Import from Printful or Import from Printify.
- Check the prices and stock, click Next, then click the import button, for example Import 2 products.
Each product comes in with its sizes, colors, prices and photos. Stock isn't counted: each item is printed when it's ordered. Import again any time to bring in changes. Then publish your site, so the new products show on your store.
Approve an order
- Click Orders. A paid order with print-on-demand items says Needs approval in the Shipping column.
- Open the order. Under Print on demand, click Approve and send to Printful (or Printify).

- Click Send. The printer prints the items, ships them to your customer and charges you for them.
You can also click the check mark on the order's row. Each printer gets only its own items, and anything from your own stock stays with you to ship.
After you approve
- The Shipping column says At the printer while the printer makes the order.
- When the printer ships, Payly marks those items shipped and emails your customer the tracking. See Emails your customers receive.
- Your customers pay the shipping rates you set in Settings > Shipping & Tax. The printer charges you its own price and shipping.
If a printer can't take an order
The Shipping column says Not sent to printer, and the order shows the printer's reason. Payly emails you once. Fix what it says, for example the customer's address, then click Send again.
Test orders
- Printful gets a test order as a draft. A draft is never printed or charged unless you confirm it in Printful.
- Printify doesn't support test orders, so a test order isn't eligible to be sent there. Its button is grayed out.
The Shipping column says Test, not printed.
Turn it off or disconnect
- To pause, turn off the switch. Paid orders wait until you turn it back on.
- To disconnect, click Settings, then Disconnect. Payly forgets your token and stops sending orders. Your products stay in your store.