
Your launch checklist
Work through the Getting set up checklist and the checks to make before you open your store, from products and shipping to a test order.
Opening a store takes three connections and a few checks. Payly tracks the connections for you on the Overview tab of Dashboard & Analytics. The checks are yours to make, and they are worth doing before you tell customers you are open.
Work through the Getting set up checklist
In your site dashboard, click Dashboard & Analytics. The Getting set up card, near the top of the Overview tab, lists five steps and ticks each one when it is done.
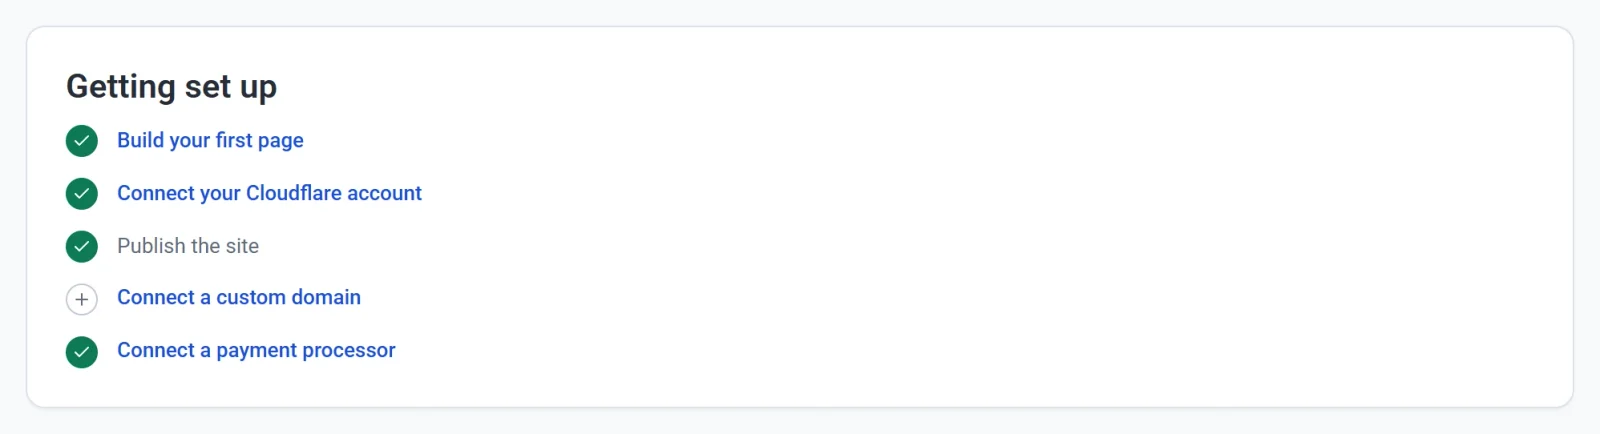
- Build your first page. Click it to open the editor. See The editor at a glance.
- Connect your Cloudflare account. This is where your store is hosted. See Connect your Cloudflare account.
- Publish the site. See Publish your first site.
- Connect a custom domain. This step is optional, because your store already has a free address. See Connect a custom domain.
- Connect a payment processor. Connect Stripe, PayPal or both. See Connect Stripe and Connect PayPal.
You do not have to follow the order. Payly asks for Cloudflare when you first publish, for example. Once every step is done, the card disappears from the Overview tab.
Check your store before you open
Go through this list as a customer would. Tick things off as you go.
- Products. Every product has a name, a price, photos and a description. Replace or delete any sample products you kept. See Add a product.
- Your own words. The About, Contact, Privacy policy and Terms pages start with example text. Replace it with your own. See Add and manage pages.
- Shipping and tax. In Settings > Shipping & Tax, set the shipping rates for the places you ship to and the tax rates you must collect. See Set up shipping zones and Set up sales tax.
- Language and currency. In Settings > General, check the store language and currency. See Set your store currency.
- Emails. In Settings > Emails, see which emails you and your customers receive. See Choose which emails you receive.
- Phones. In the editor, switch between Desktop, Tablet and Mobile to see each layout. See Make your site look right on phones and tablets.
Place a test order
Test mode lets you buy from your own store without real money. While it is on, checkout uses your sandbox connections, and shoppers see a test-mode notice.
- In Settings > Payments, turn on Test mode and connect your test accounts.
- Publish your store and place an order, the way a customer would.
- Open Orders and check that the order is there. While Test data is on, the Orders screen shows only test orders.
See Take test payments with test mode for the details.
Switch to live payments
- Go to Settings > Payments.
- Turn off Test mode. Payly confirms with the message "Test mode off. Checkout is live."

- Connect your live Stripe or PayPal account if you have not already. Your test and live connections are kept separately, so each one comes back when you switch modes.
Important: Leave test mode on and nobody can pay you for real. Check this switch last, right before you share your store address.