
The editor at a glance
A tour of the Payly editor: the top bar, the Blocks panel, the canvas and the settings panel, plus how saving, undo and keyboard shortcuts work.
The editor is where you build your store's pages. You see each page the way a visitor will see it, and you change it by selecting things, dragging them around and filling in their settings. Nothing you do here is visible to visitors until you publish.
Open the editor
- Open your site dashboard.
- Click Edit site at the top of the left menu.
A brand new site opens in the editor by itself right after you pick a design. See Create your first site.
The four areas
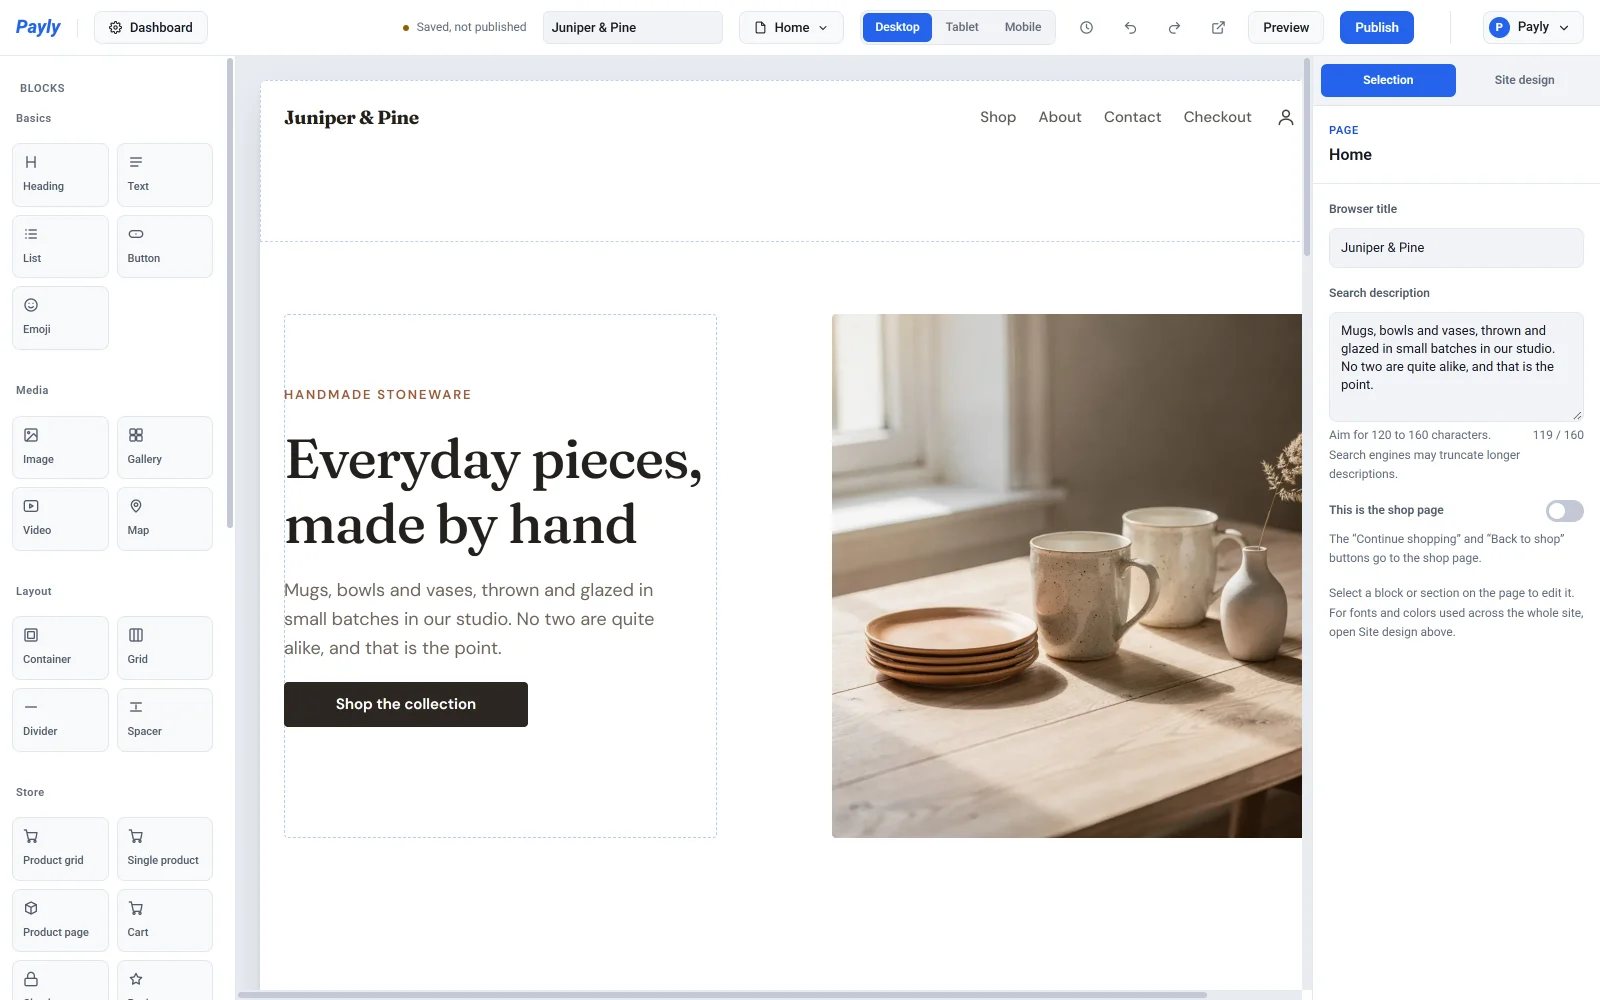
The editor has a bar across the top and three columns below it: the Blocks panel on the left, your page in the middle (the canvas) and the settings panel on the right.
The top bar
From left to right, the top bar holds these controls:

- Dashboard takes you back to your site dashboard.
- The save status tells you where your work stands. Saved, not published means your changes are saved in your draft but your live store does not show them yet. Saved and published means your live store matches what you see. You also see Saving… for a moment after each change, and Not saved if a save fails.
- The site name box shows your store's name. Click it to rename your site.
- The page picker (it shows the name of the page you are on, such as Home) lists your pages. Choose one to edit it. Manage pages at the bottom of the list opens the page manager. See Add and manage pages.

- Desktop, Tablet and Mobile switch the screen size you are designing for. See Make your site look right on phones and tablets.
- The clock icon (Backups) opens your saved backups. See Undo changes and restore an earlier version.
- The two arrows are Undo and Redo.
- The arrow-out-of-a-box icon (View live site) opens your live store in a new tab. It appears once you have published.
- Preview shows your whole site, working links and all, in a new tab. See Preview your site before publishing.
- Publish puts your changes on your live store. See Publish your first site.
- The account menu at the far right holds the theme and language for Payly itself (they do not change your store), plus Settings, Payly home and Sign out.
The Blocks panel
The left column starts with Blocks, the building pieces you can add to a page, sorted into groups: Basics, Media, Layout, Store, Marketing and Menus & Forms. Drag a block onto the page, or click it to add it to the end of the current section. See Add, move and resize blocks.
Scroll down in the same column to find Structure, a list of the header, the sections of the current page and the footer, with an Add section button. See Work with sections.
The canvas
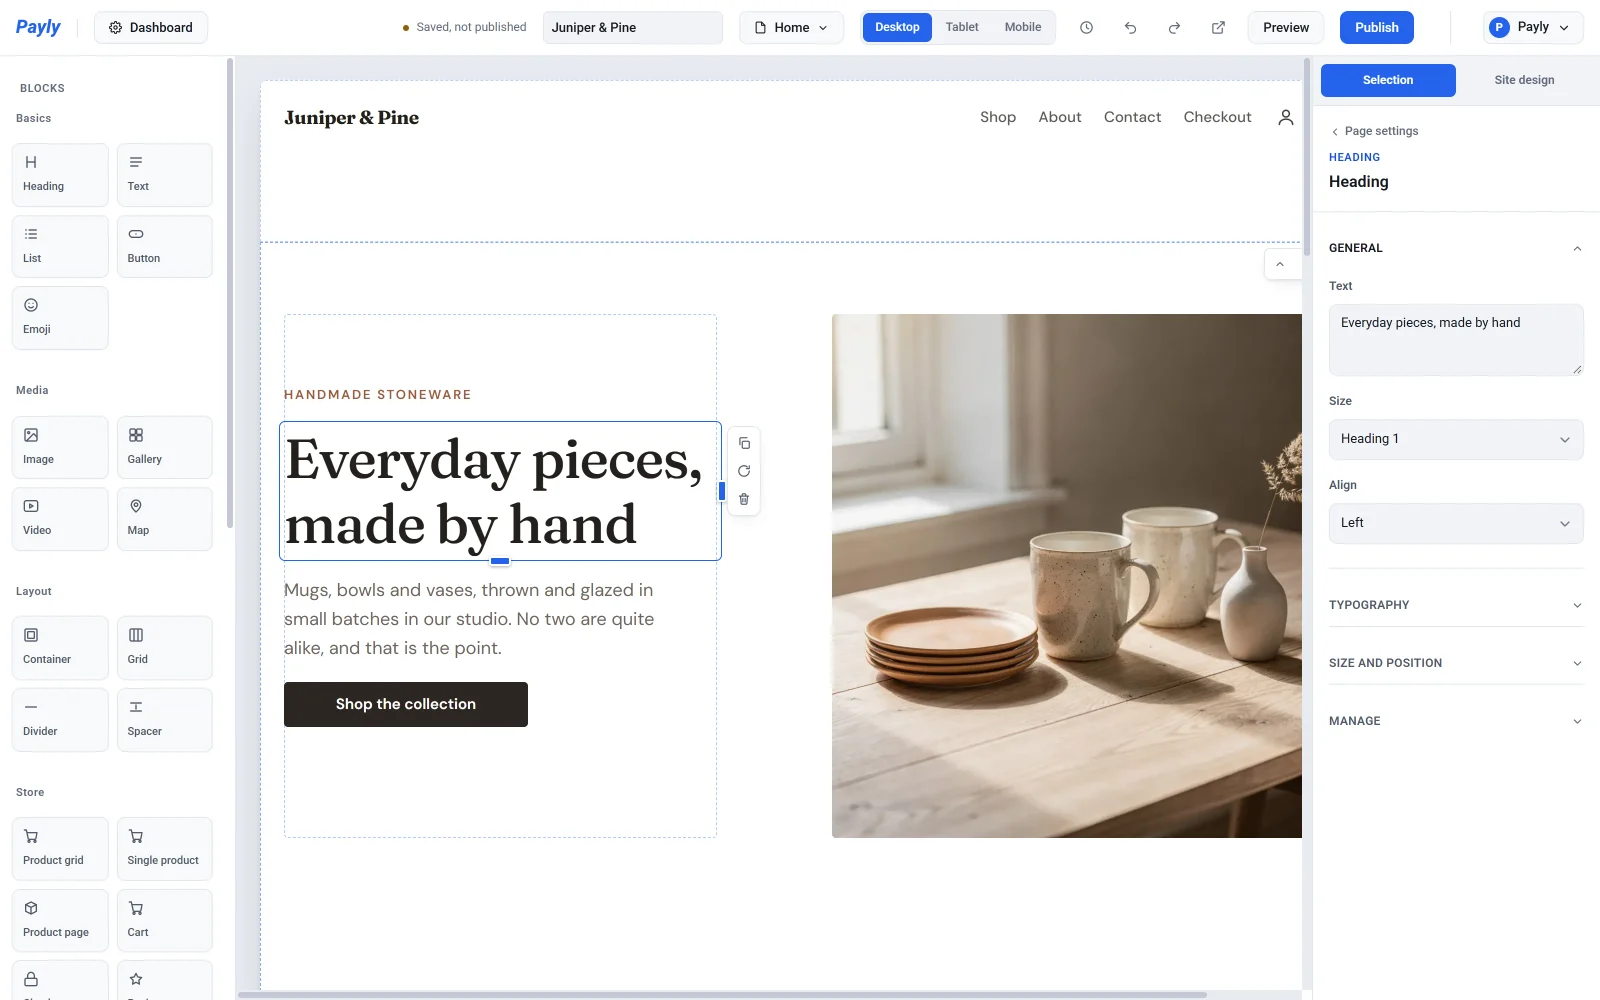
The middle of the screen is your page. It is drawn by the same code that draws your live store, so what you see is what visitors get. Click any block or section to select it. A selected block gets a blue outline, resize handles and a small toolbar with Duplicate, Rotate and Delete buttons. Links on the canvas do not open when you click them.
The settings panel
The right column has two tabs:
- Selection shows the settings of whatever you have selected. With nothing selected, it shows the settings of the page itself: its Browser title, Search description and This is the shop page switch. Select a block and it shows that block's settings, grouped under headings such as General, Typography, Size and position and Manage. Click a heading to open it. To get back to the page settings, click Page settings at the top of the panel, press Esc, or click on the gray area beside the page.
- Site design holds the colors, fonts and layout settings that apply to every page. See Set your colors, fonts and layout.
How saving works
The editor saves for you. A moment after you stop changing something, it saves your draft and the status in the top bar returns to Saved, not published. There is no Save button.
A saved change is not live. Your visitors keep seeing your last published version until you click Publish.
Undo and redo
Click Undo to take back your last change, and Redo to bring it back. They remember the changes you made since you opened the editor. If you close or reload the editor, that history starts again from the saved version.
Keyboard shortcuts
On a Mac, use Cmd in place of Ctrl.
| Keys | What they do |
|---|---|
| Ctrl + Z | Undo the last change |
| Ctrl + Shift + Z | Redo |
| Ctrl + D | Duplicate the selected block |
| Delete or Backspace | Delete the selected block |
| Esc | Clear the selection |
| Arrow keys | Nudge the selected block by 1 pixel (hold Shift for 10) |
| Ctrl + arrow keys | Move the selected block by one grid cell |
| Ctrl + Shift + arrow keys | Make the selected block one cell wider, narrower, taller or shorter |