
How product pages work
Every product gets its own page from one shared design. See what a product page shows, how shoppers reach it, and how to change its layout.
Every product you sell gets its own page on your store. You do not build these pages one by one. Payly draws all of them from a single design, called the product template, and fills in each product's name, photos, price and description.
What a product page shows
A product page uses everything you entered when you added the product:
- The photos, with the first one large. If there are more, small pictures let the shopper switch between them.
- The name, the price, and the higher compare-at price struck through when you set one. A subscription shows its billing terms next to the price.
- The star rating and, further down, the customer reviews and the form for writing one. See Collect and moderate product reviews.
- A stock note such as "In stock" or "Only 2 left", if you track stock.
- The description, a drop-down list for each option, the Add to cart button, and the SKU.
- A link back to your shop, above the photos.
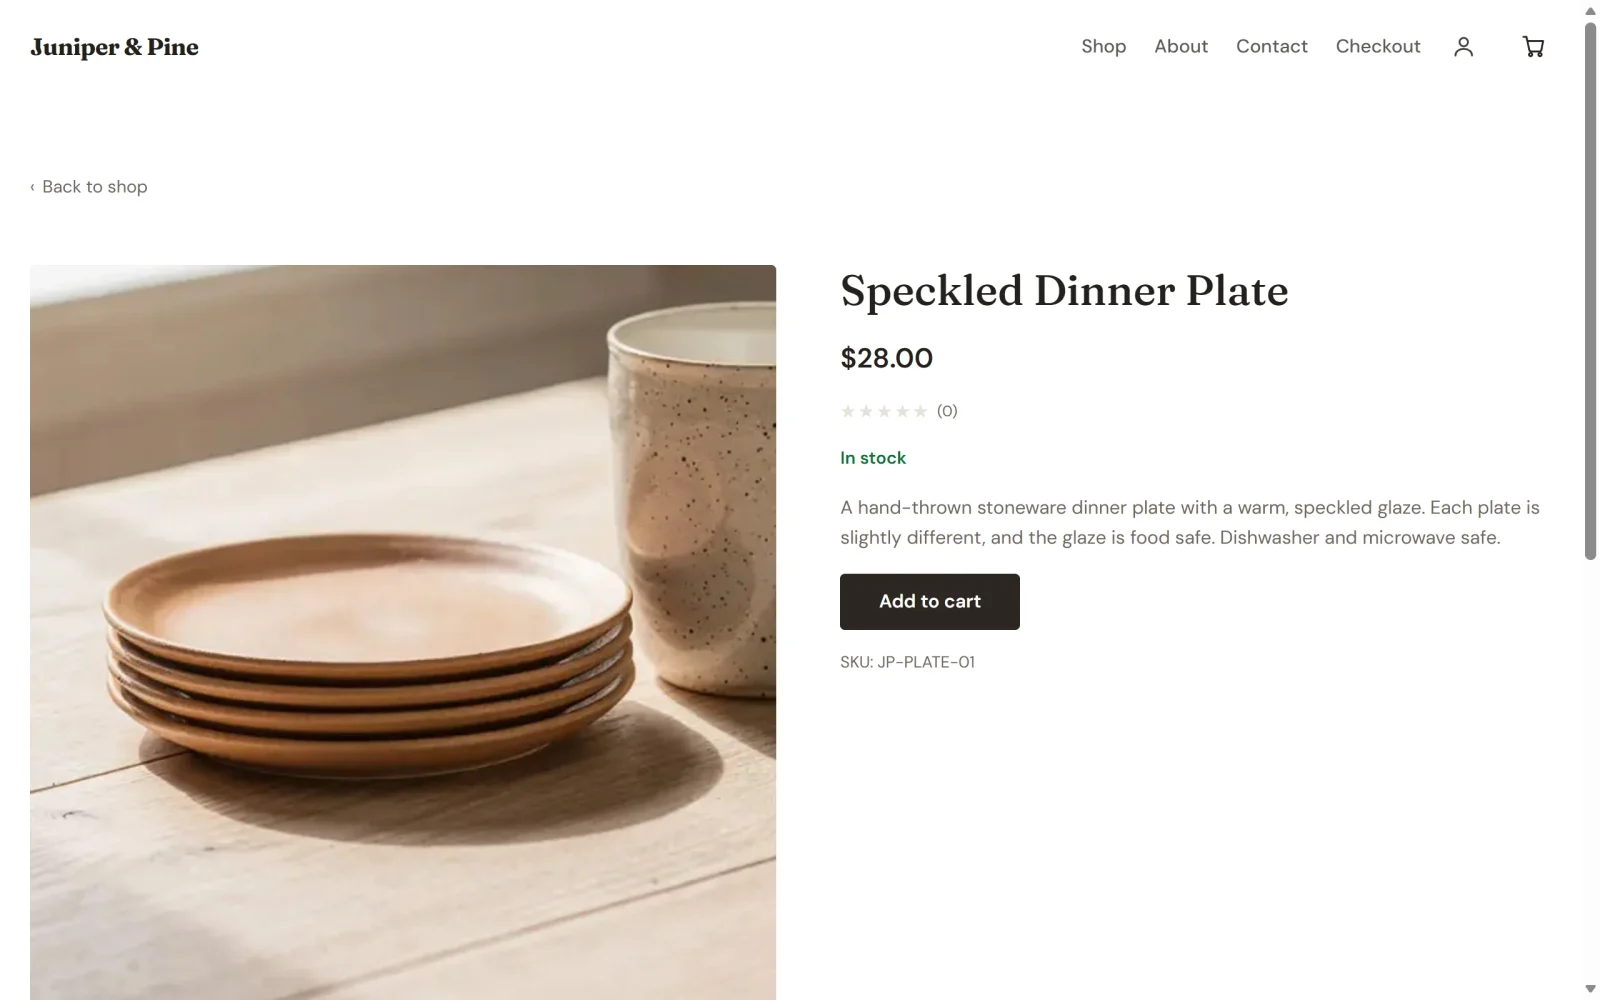
The page address is your store address followed by /product/ and a short name made from the product name, such as /product/speckled-dinner-plate. A product you move to draft or to the trash has no page. Shoppers who open its old address see a "not found" page.
The browser tab shows the product name followed by your store name. The short description that search engines show comes from the start of your product description, and the first photo is the picture used when someone shares the link. See Help customers find your store on Google.
How shoppers reach a product page
A shopper can open a product page in three ways: from a link you share, from a product grid on your site, or from the pop-up that a grid opens. By default, clicking a product in a grid opens that pop-up, which shows the main details and an Add to cart button. A View full details link in the pop-up goes to the full page.
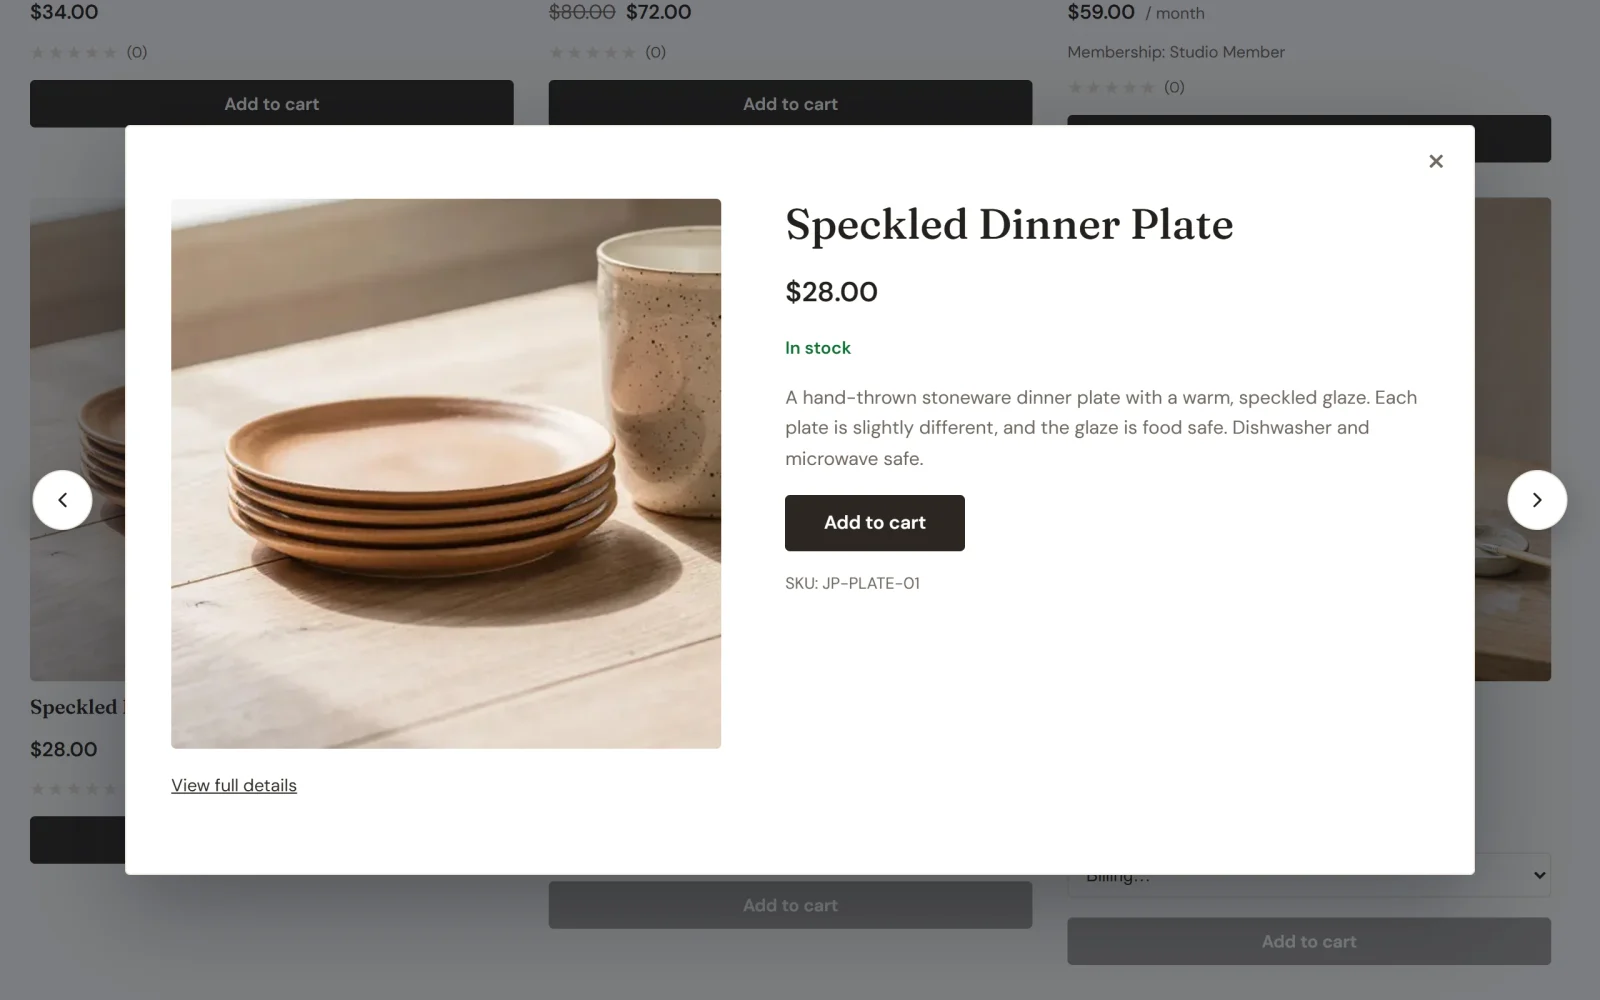
To send shoppers straight to the full page instead, select the product grid in the editor, open General and turn off Open products in a pop-up. Publish your site to apply the change.
Change the layout of every product page
All product pages share one layout, so a change you make once appears on all of them. You need at least one product before the product template is available.
- Click Edit site in your site dashboard.
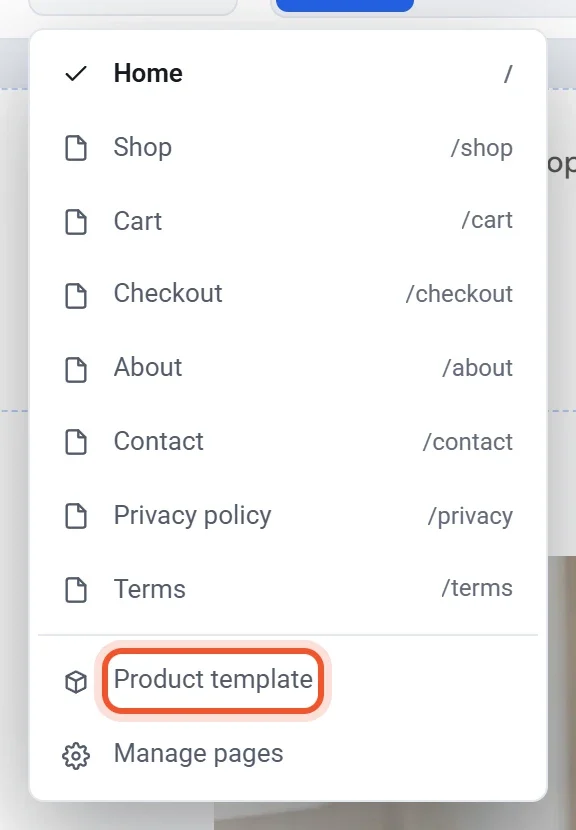
- Click the page name in the top bar to open the page list, then click Product template.
- Click the product block on the page. The editor shows one of your products as a stand-in, so you can see how the design looks with real content.
- In the panel on the right, open General to turn the Photo gallery, Description, SKU and Reviews on or off, or to change the Button text.
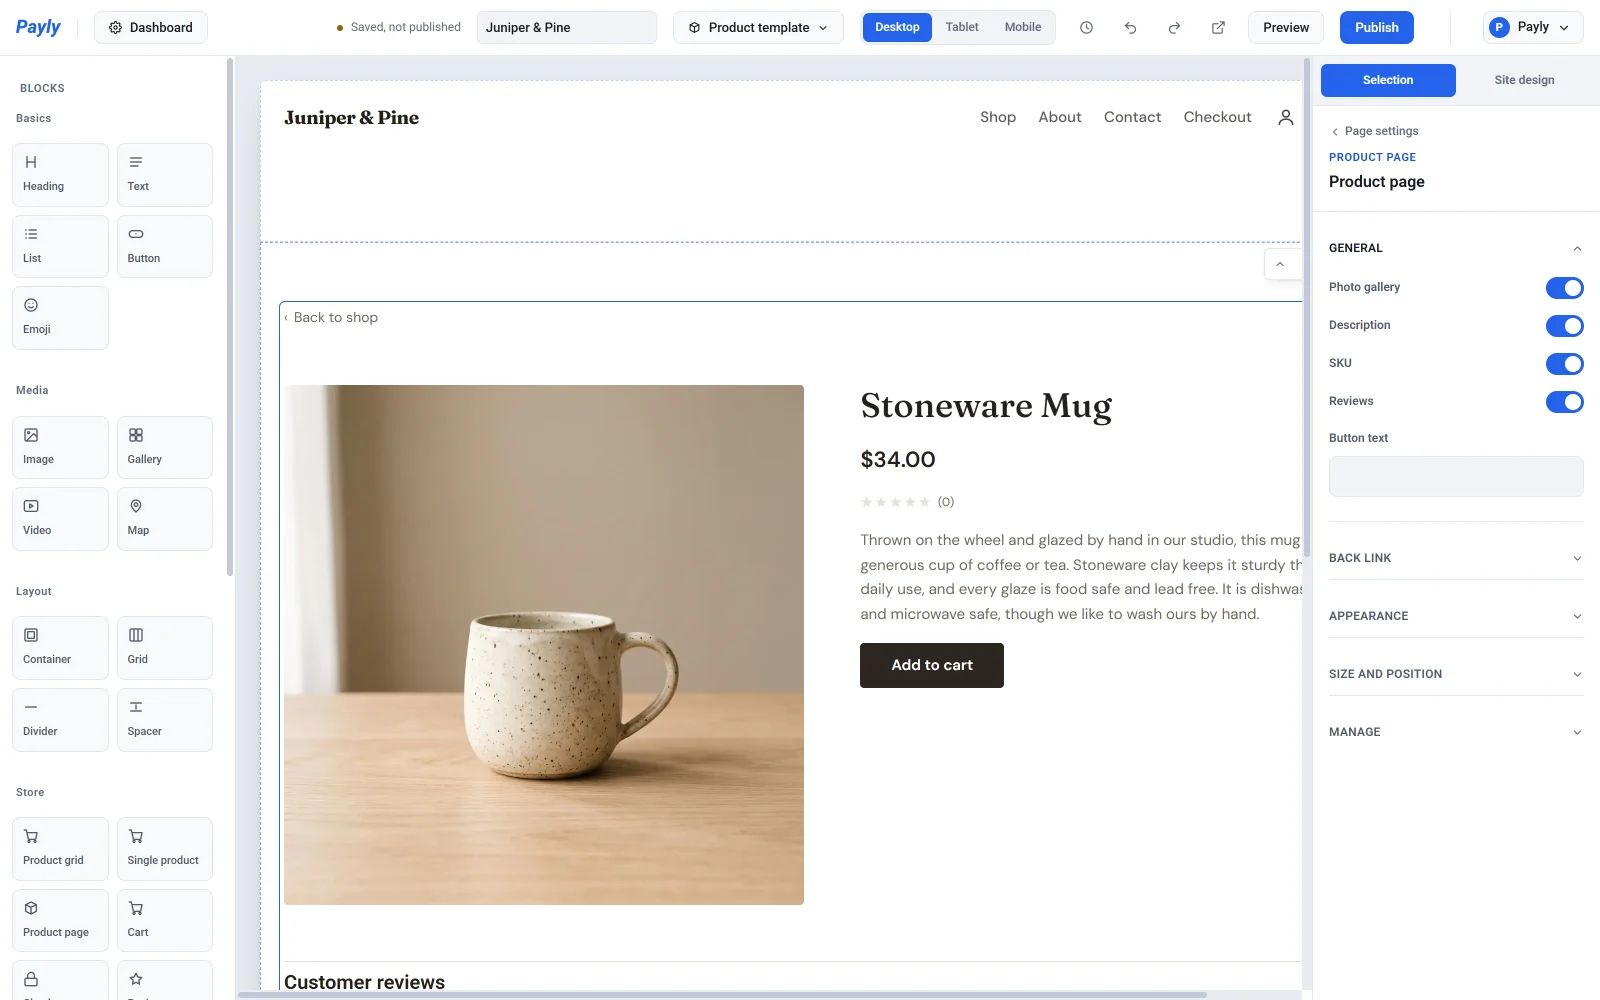
- Open Back link to choose which page the link above the photos goes to and what it says. By default it goes to your shop page. See Set up your shop page.
- To add more to every product page, drag other blocks from the left onto the page, such as a line of text about shipping.
- Click Publish.
Note: Changes to a single product, such as its price, photos or description, reach your store as soon as you save the product. Changes to the product template are part of your site's design, so they need Publish.