
Search, filter and bulk-edit lists
Every list in your dashboard works the same way: search it, filter it by status, change many items at once, and use the trash to remove and restore.
Orders, products, customers, discounts and most other dashboard screens are lists, and they share the same controls. Learn them once and you can use them everywhere. This article uses the Discounts list as its example.
The parts of a list
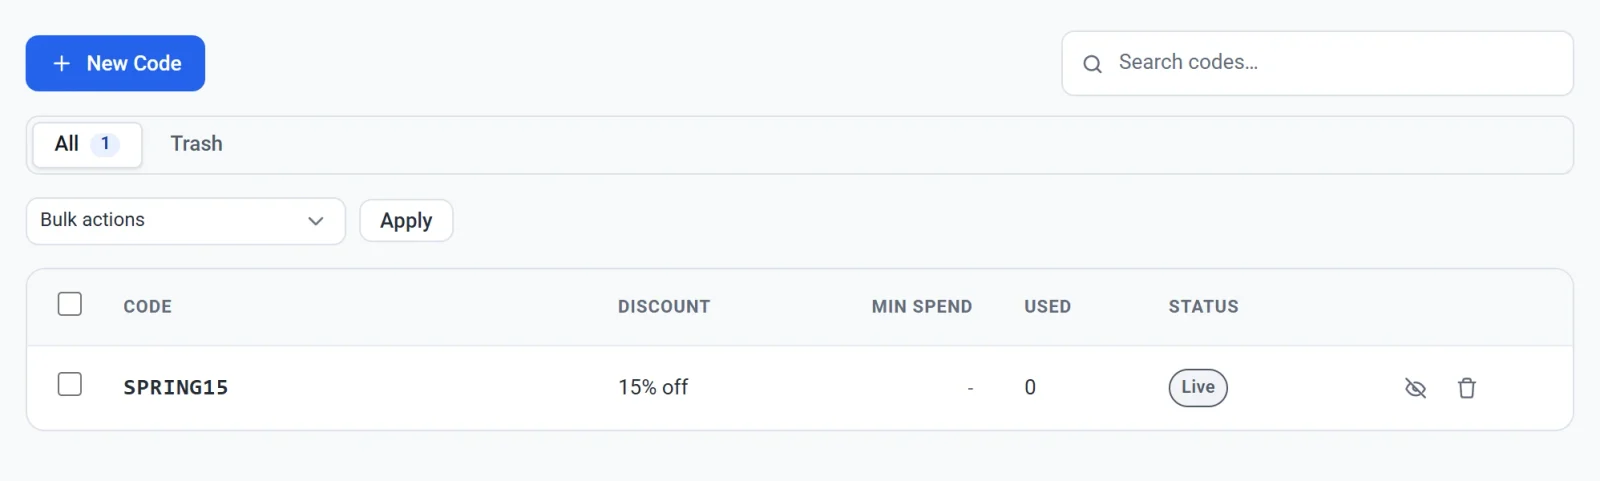
- The button at the top left adds a new item. Its name depends on the list, such as New Code or Add Order.
- The search box is at the top right.
- The status bar sits under them. It starts with All, adds any statuses the list has, and ends with Trash on lists that have one. Each tab shows how many items it holds.
- The Bulk actions menu and the Apply button change several items at once.
- Each row has a checkbox. The checkbox in the table header selects all of the rows.
- A bar above and below the table shows how many items there are, a Per page menu, and the page you are on.
Search a list
Click the search box and start typing. The list narrows as you type, and capital letters do not matter. The box tells you what it searches. On Orders it searches reference, name and email. On Products it searches name, SKU and tag. If nothing matches, the list says Nothing matches followed by your search. Clear the box to see everything again.
Filter by status
Click a tab in the status bar to see only those items. Some lists add statuses of their own. Orders has Paid, Pending, Failed, Refunded, Shipped and Disputed, for example. Search works inside the tab you have open.
Change several items at once
- Tick the checkbox on each item you want to change. To select every row, tick the checkbox in the table header.
- Open the Bulk actions menu and choose an action. The choices depend on the list. On Discounts they are Resume, Pause and Move to trash. On Reviews they include Approve and Reject.
- Click Apply.
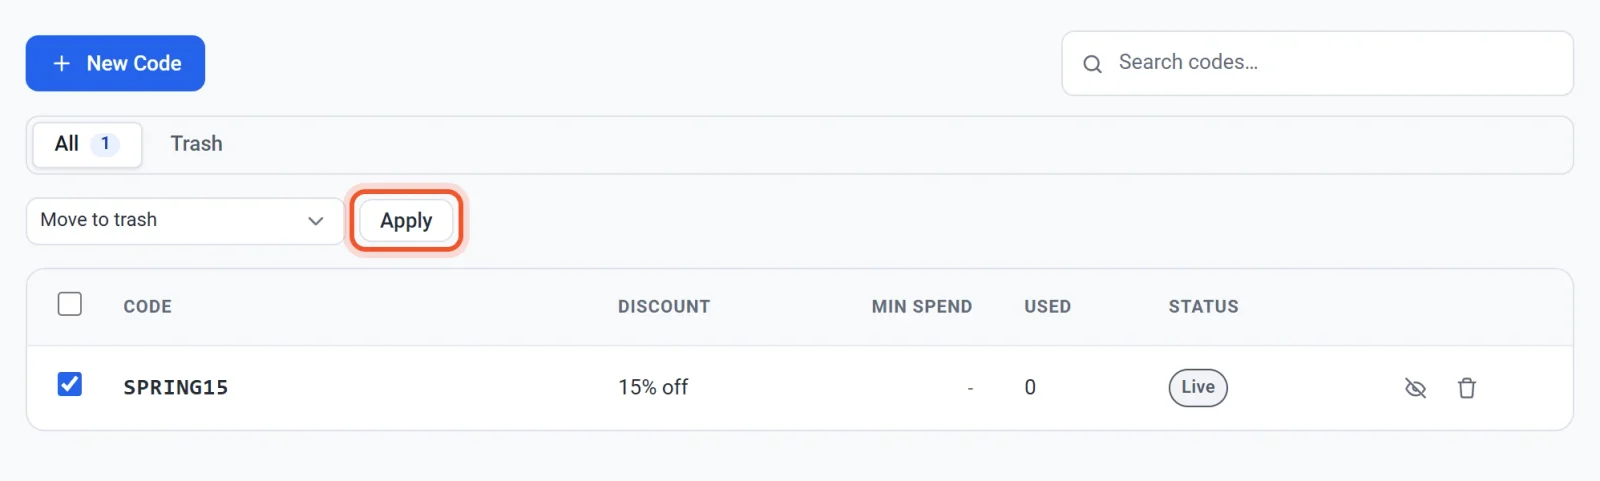
Payly does not ask you to confirm, because you have already ticked rows and chosen an action. If you click Apply too soon, a message tells you to choose an action first or to select the rows you want to update.
For a single item, you can also use the small buttons at the end of its row, such as the pause or trash button.
Use the trash
Most lists have a trash. Move to trash hides an item without deleting it, so a slip of the mouse does not cost you anything.
- Tick the items, choose Move to trash from Bulk actions, and click Apply.
- Click Trash in the status bar to see what you have trashed.
- To bring items back, tick them, choose Restore, and click Apply.
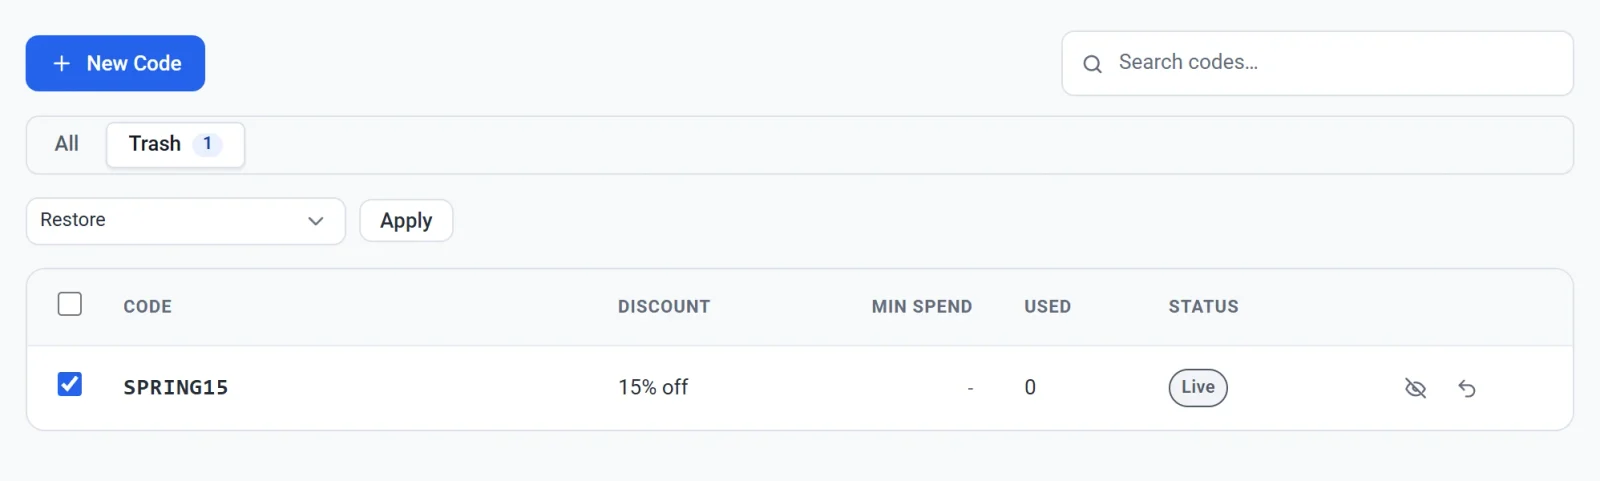
- To remove items for good, tick them in the trash, and on lists that offer it choose Delete permanently, and click Apply.
Important: Delete permanently cannot be undone, and Payly does not ask you to confirm it. Check which rows are ticked before you click Apply.
Move through long lists
A list shows 10 items at a time. The bar above and below the list shows the number of items, a Per page menu, the page you are on, and arrows to go to the previous and next page. The arrows are grayed out while everything fits on one page. You can choose 10, 20, 50, 100 or All. Payly remembers your choice for each screen in your browser. Orders and Media load a page at a time, so they offer 10, 20, 50 and 100 but not All, and the checkbox in the header selects the rows on the page you are looking at.