
Build layouts with containers and grids
Group blocks in a container, or place them in the cells of a grid, to build cards, columns and other layouts that you style and move as one piece.
Containers and grids are blocks that hold other blocks. A container groups blocks into a box, which you can give a background and move as one piece. A grid arranges blocks in a table of rows and columns. You find both in the Layout group of the Blocks panel.
Which one to use
- Use a container for a card, a panel with a colored background, or a group of blocks that should stay together.
- Use a grid when you want items lined up in equal columns, such as three short features side by side.
Both give the blocks inside them their own space. If you only need to spread blocks across a page, you do not need either: place them directly in a section.
Build a container
- In the Blocks panel, find Container under Layout.
- Drag it into a section, and drop it where you want it. An empty container shows Drop blocks in here.
- Drag a block from the Blocks panel onto the container. The container gets a blue outline to show that the block will go inside it.
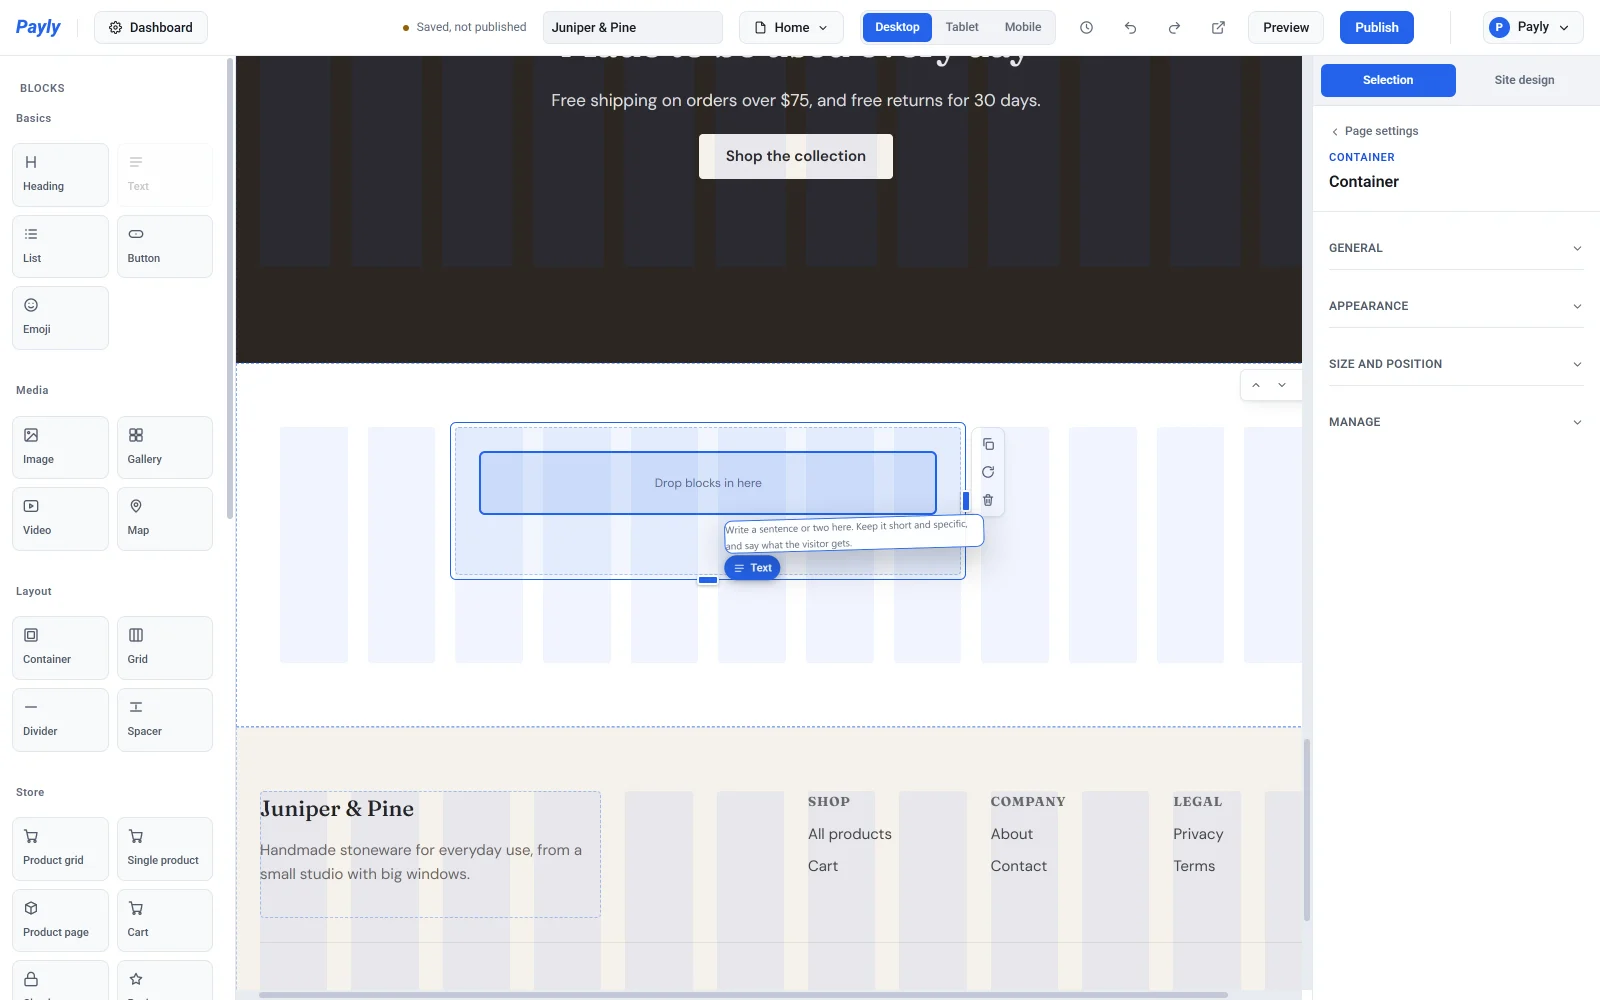
- Release the mouse button. The block appears inside the container and fills its width.
- Add more blocks the same way.
You can also drag blocks that are already on the page into a container, and drag blocks back out. A container can hold other containers. Inside a container you move and resize blocks exactly as you do on the page. See Add, move and resize blocks.
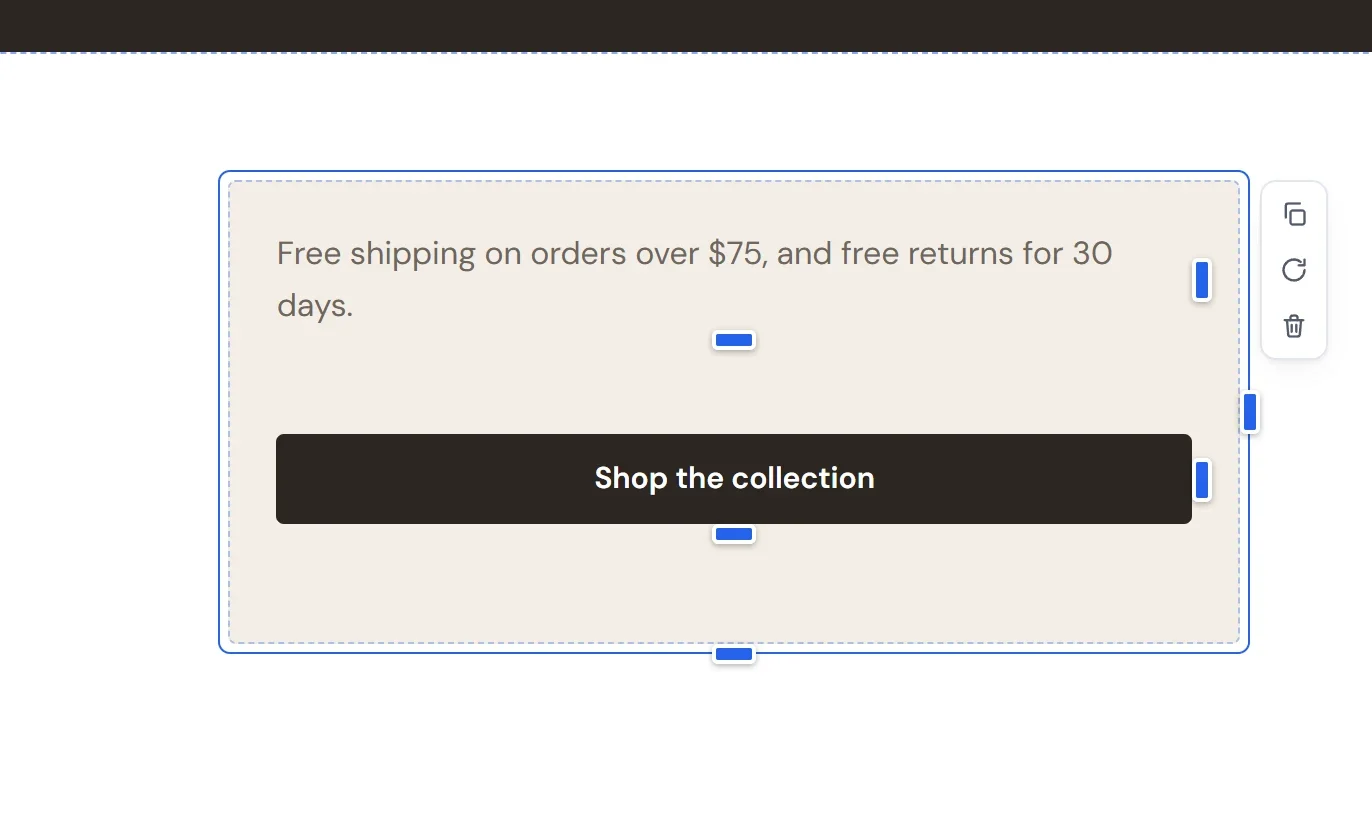
Important: Deleting a container deletes every block inside it. If you do this by mistake, click Undo in the top bar.
Change how a container looks
- Click the container, not a block inside it. A good spot is the empty space between two of its blocks.
- In the settings panel, open General and Appearance.
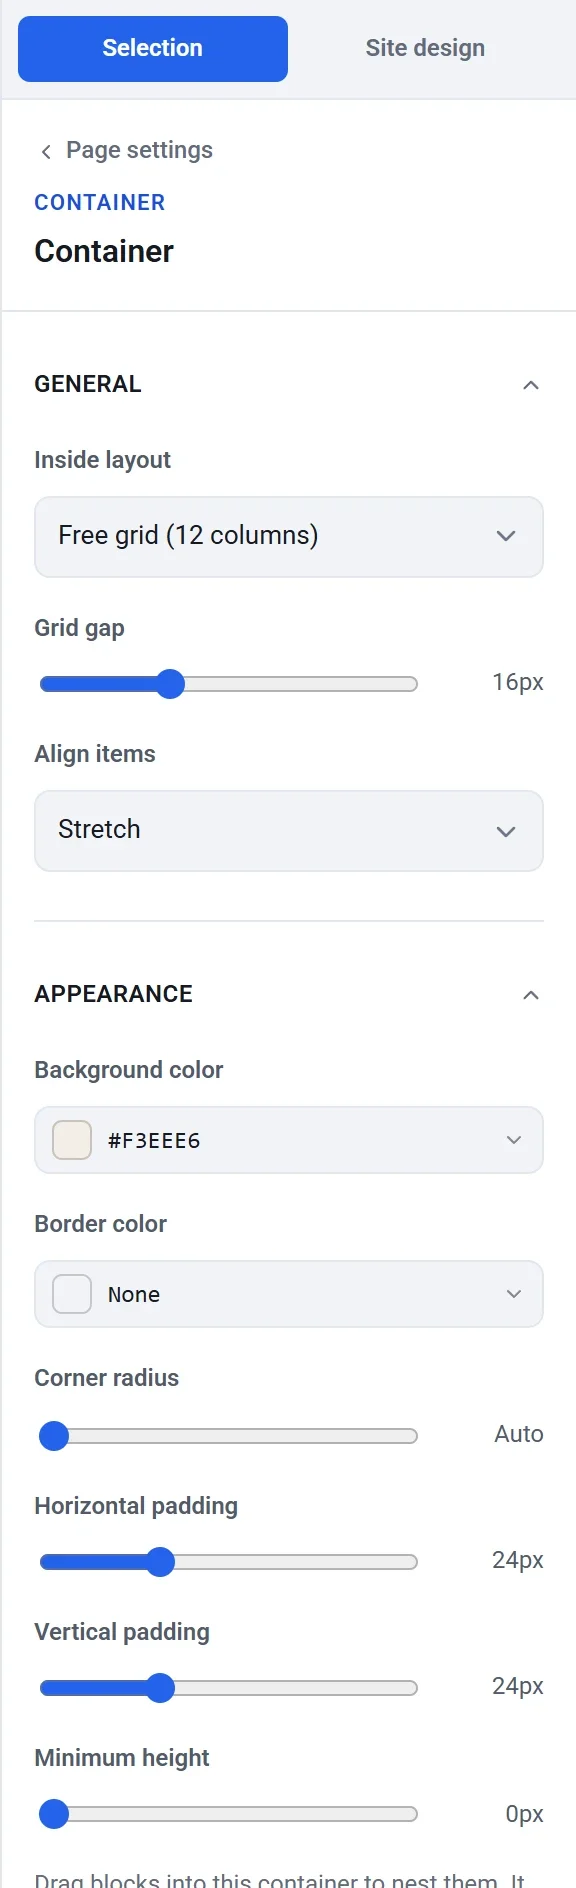
Under General:
- Inside layout decides how the blocks are arranged. Free grid (12 columns) lets you place blocks anywhere, like a section. Stacked puts the blocks one under another. Side by side puts them in a row, and wraps them onto new lines when there is no room.
- Grid gap is the space between the blocks.
- Align items sets where the blocks sit when the container is taller than they are: Stretch, Top, Middle or Bottom.
Under Appearance: Background color, Border color, Corner radius, Horizontal padding and Vertical padding (the space between the edge and the blocks), and Minimum height.
Note: You can only drop new blocks into a container whose Inside layout is Free grid (12 columns). To fill a Stacked or Side by side container, switch it to Free grid, drop the blocks in, then switch it back.
Build a grid
- Drag Grid from the Layout group into a section. A new grid has 3 columns and 2 rows, drawn as dashed cells.
- With the grid selected, open General in the settings panel. Use Number of columns and Number of rows to set the shape. Each can be from 1 to 8.
- Drag a block onto the cell where you want it. The blue box shows the cell it will land in.
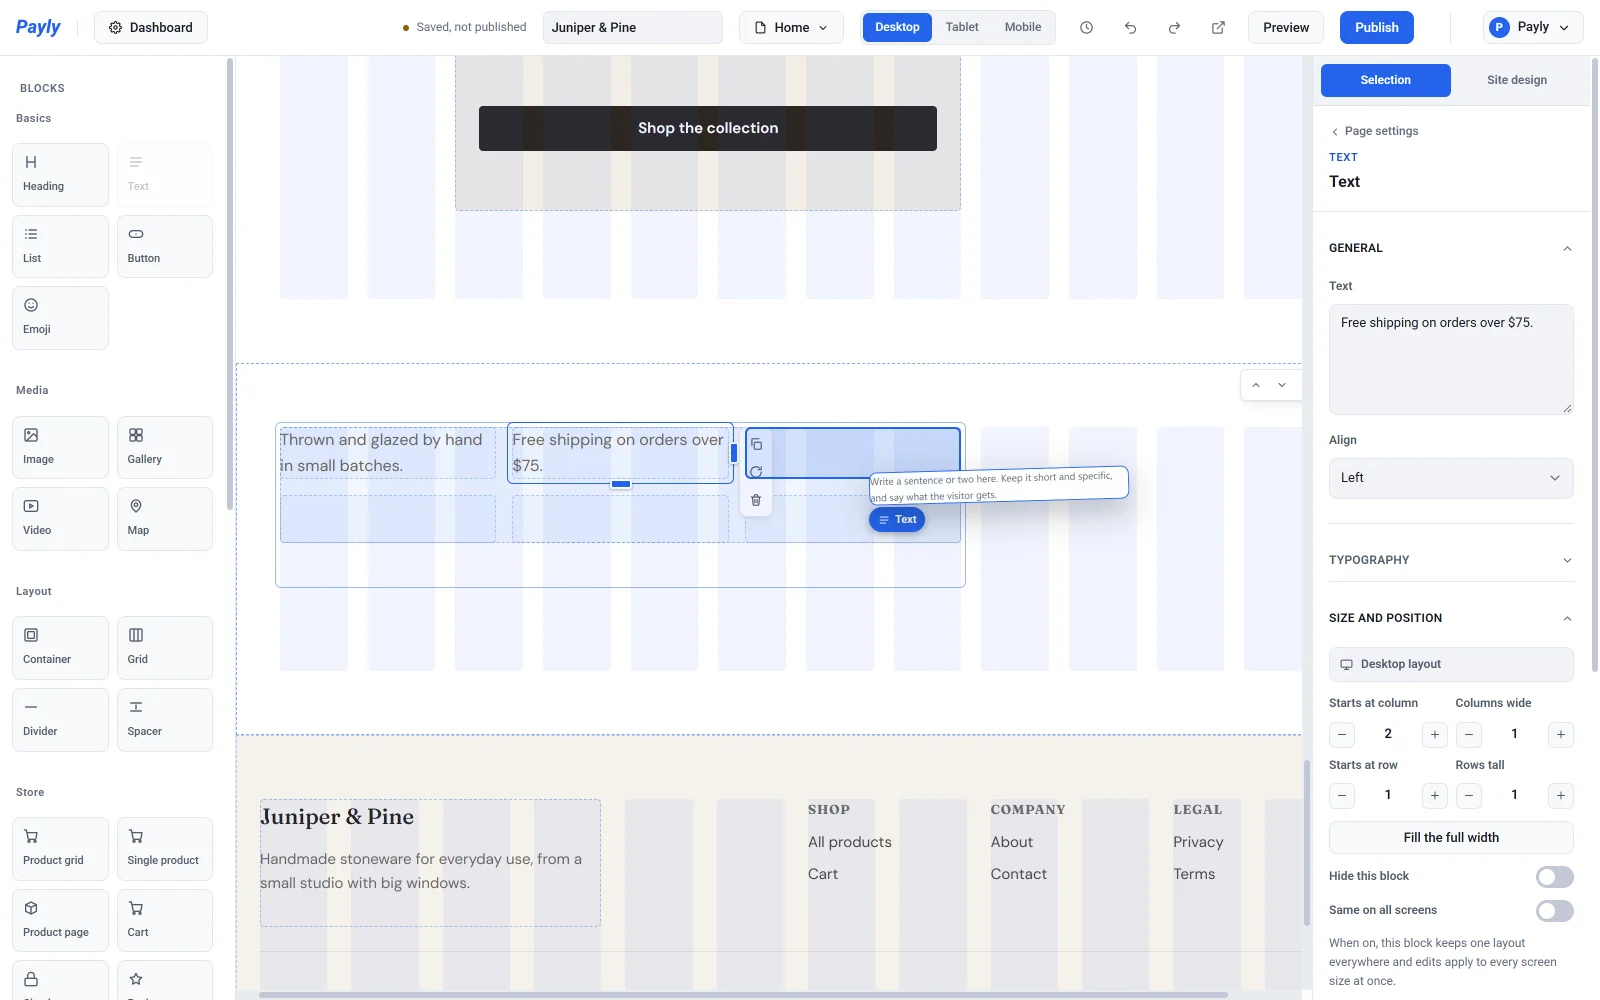
- Release the mouse button.
- If the block stretched across several cells, make it one cell wide. Select it, open Size and position and set Columns wide to 1, or drag its right edge handle back to the cell edge.
A new block keeps its usual width, up to the number of columns in the grid, so it often fills a whole row at first. Blocks can also span several cells on purpose, like a merged cell in a table: widen or heighten a block to cover more of the grid.
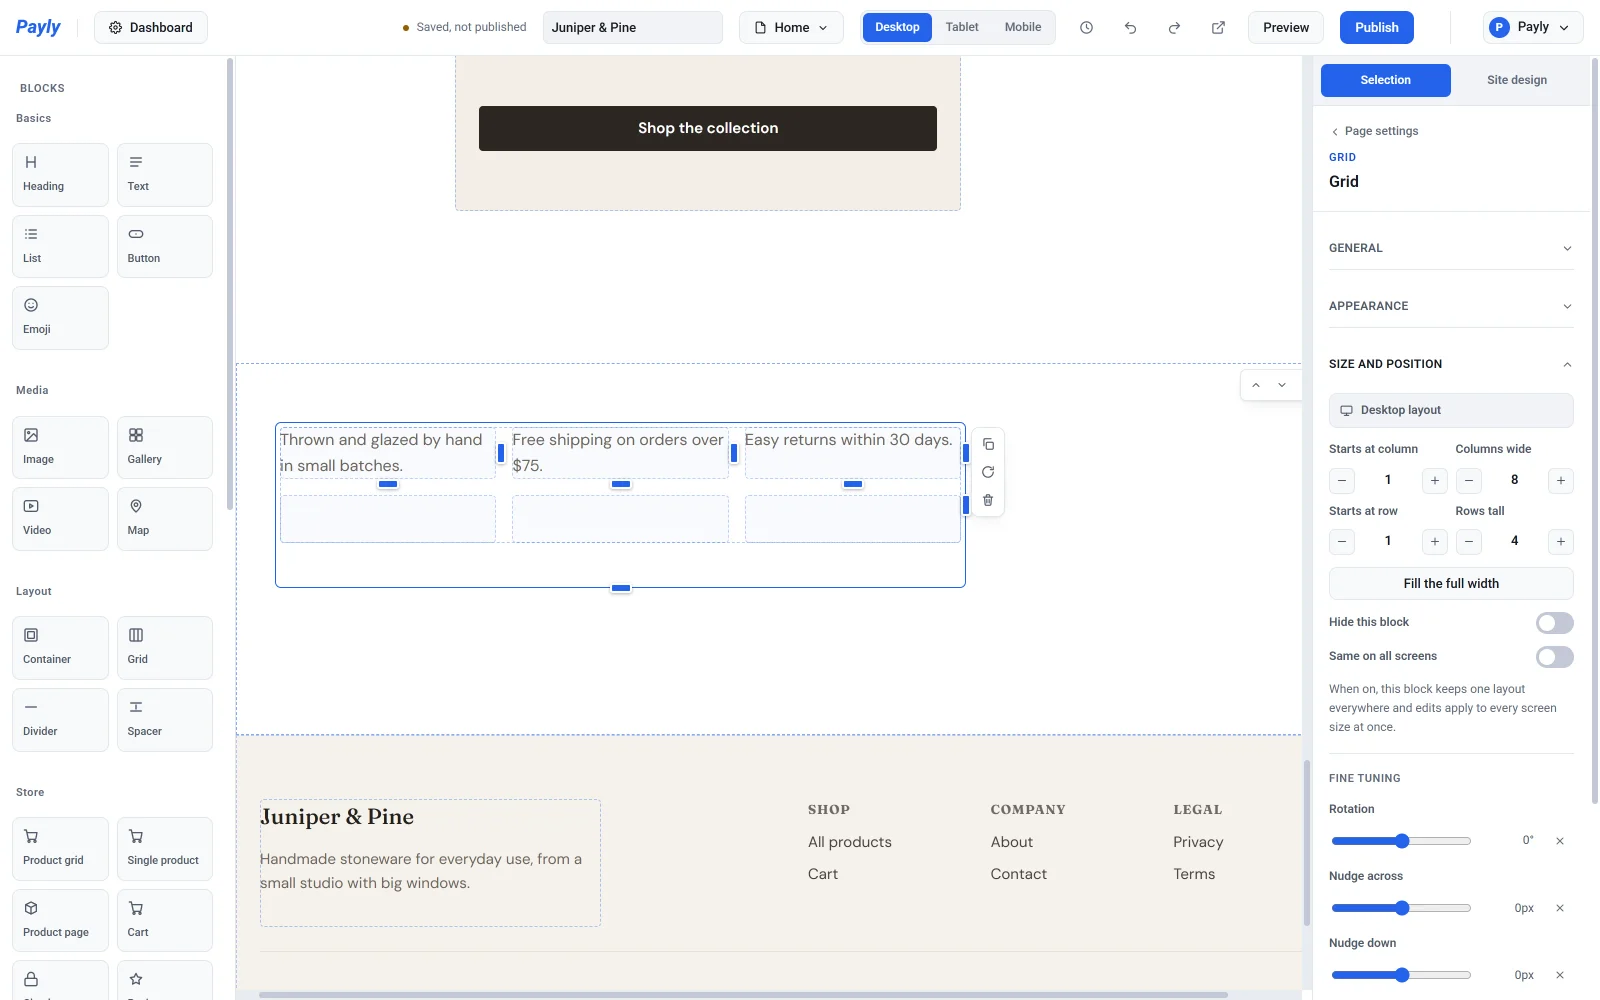
Grid settings
- Grid gap and Align items work as they do for a container.
- Under Appearance, you can set a Background color, Border color, Corner radius and padding for the whole grid. Cell outline only changes the color of the dashed cell guides you see in the editor.
On a phone, a grid collapses to a single column and its blocks stack in order, so a three-column row becomes three blocks one under another.