
Connect Google Analytics, Google Ads and the Meta Pixel
See where your visitors come from and measure your ads. Paste an ID, publish, and Payly does the rest.
Payly can send your store's visits and sales to Google Analytics, Google Ads and the Meta Pixel. You paste an ID from each service. You never add code.
Add your IDs
- In your site dashboard, click Integrations.
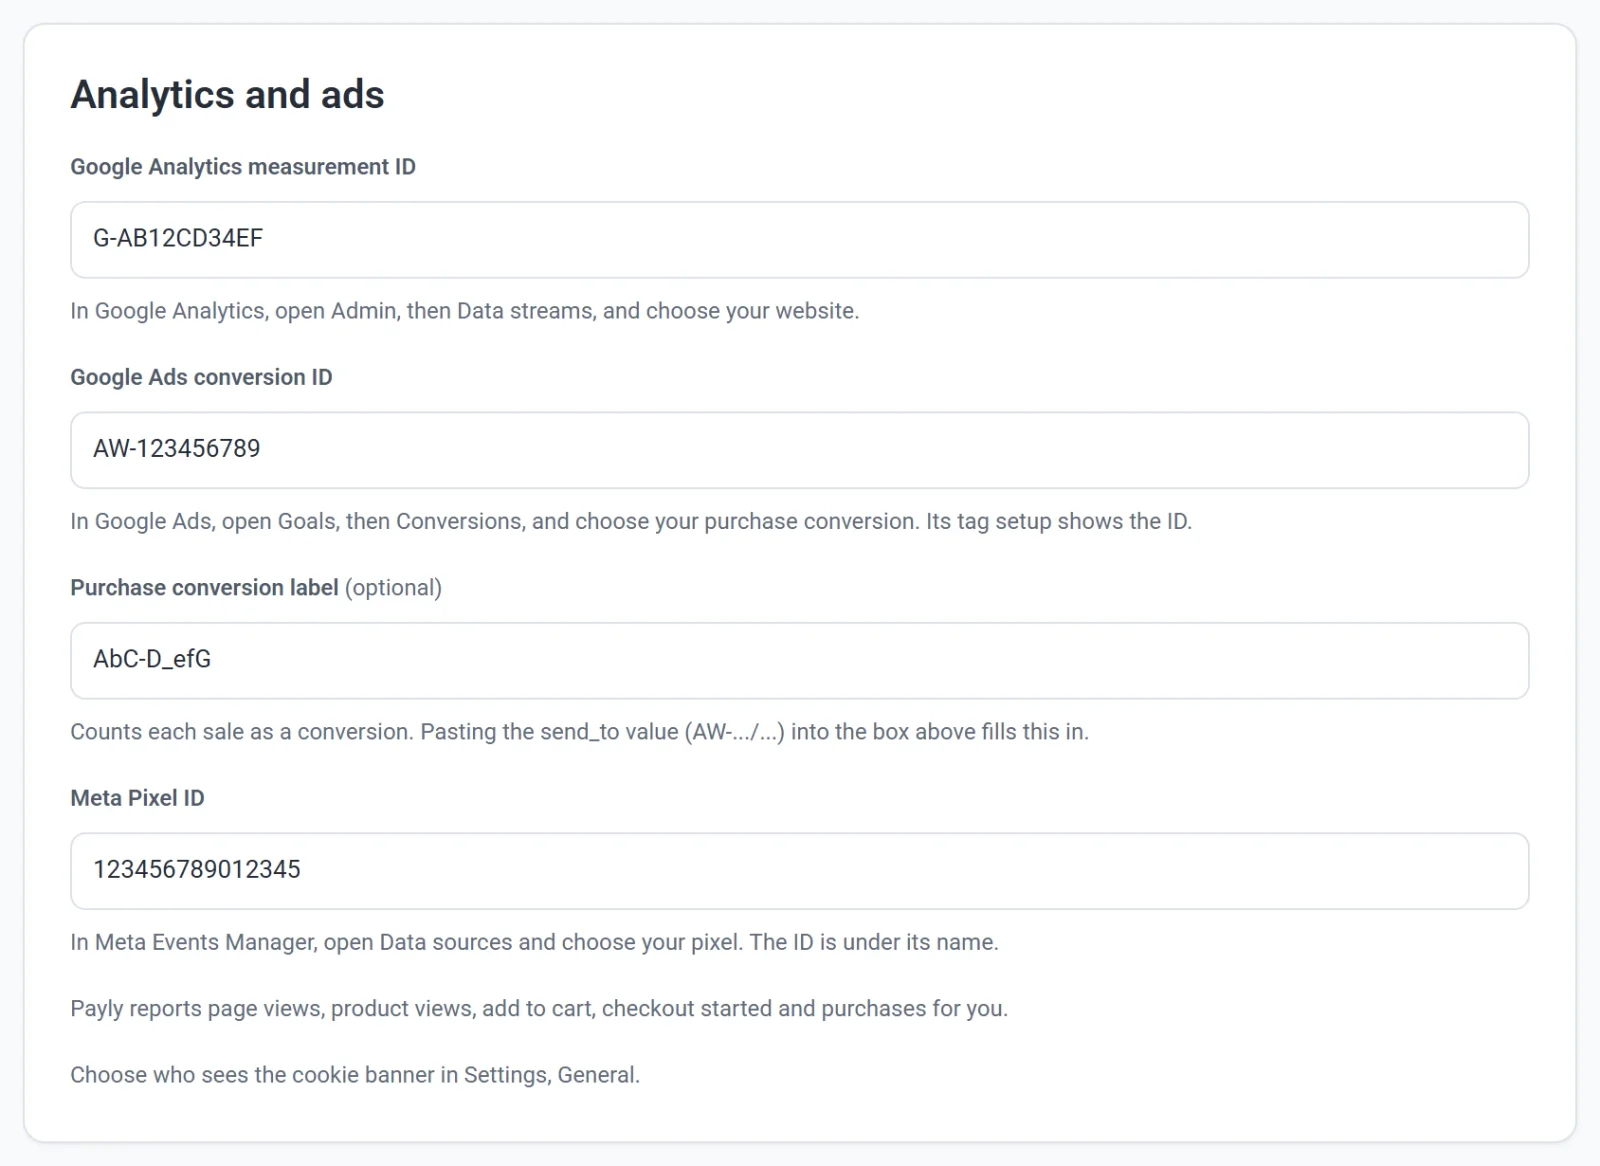
- Paste the IDs you use:
- Google Analytics measurement ID. In Google Analytics, open Admin, then Data streams, and choose your website. It starts with G-.
- Google Ads conversion ID. In Google Ads, open Goals, then Conversions, and choose your purchase conversion. Its tag setup shows the ID. It starts with AW-.
- Purchase conversion label (optional). Counts each sale as a Google Ads conversion. If you paste the send_to value (AW-.../...) into the conversion ID box, Payly fills this in for you.
- Meta Pixel ID. In Meta Events Manager, open Data sources and choose your pixel. The ID is the long number under its name.
- Click Publish now. Your store starts counting once it's published.
You can paste the whole snippet a service gives you. Payly keeps just the ID.
What Payly reports
- Page views
- Product views
- Add to cart
- Checkout started
- Purchases, with the order total, tax, shipping and the products bought
Each purchase is reported once, with your order number, so a customer who opens their receipt again isn't counted twice.
The cookie banner
Choose who sees it in Settings, General, under Cookie banner, click Save, then publish.
- Europe and the UK (recommended): visitors there see the banner, and analytics and ads load only after they accept. Visitors everywhere else are counted without one.
- Every country: every visitor sees the banner before anything is counted.
- Nobody (banner off): analytics and ads load for every visitor without asking. Visitors in Europe and the UK usually have to be asked first, so choose this only if you don't sell there.
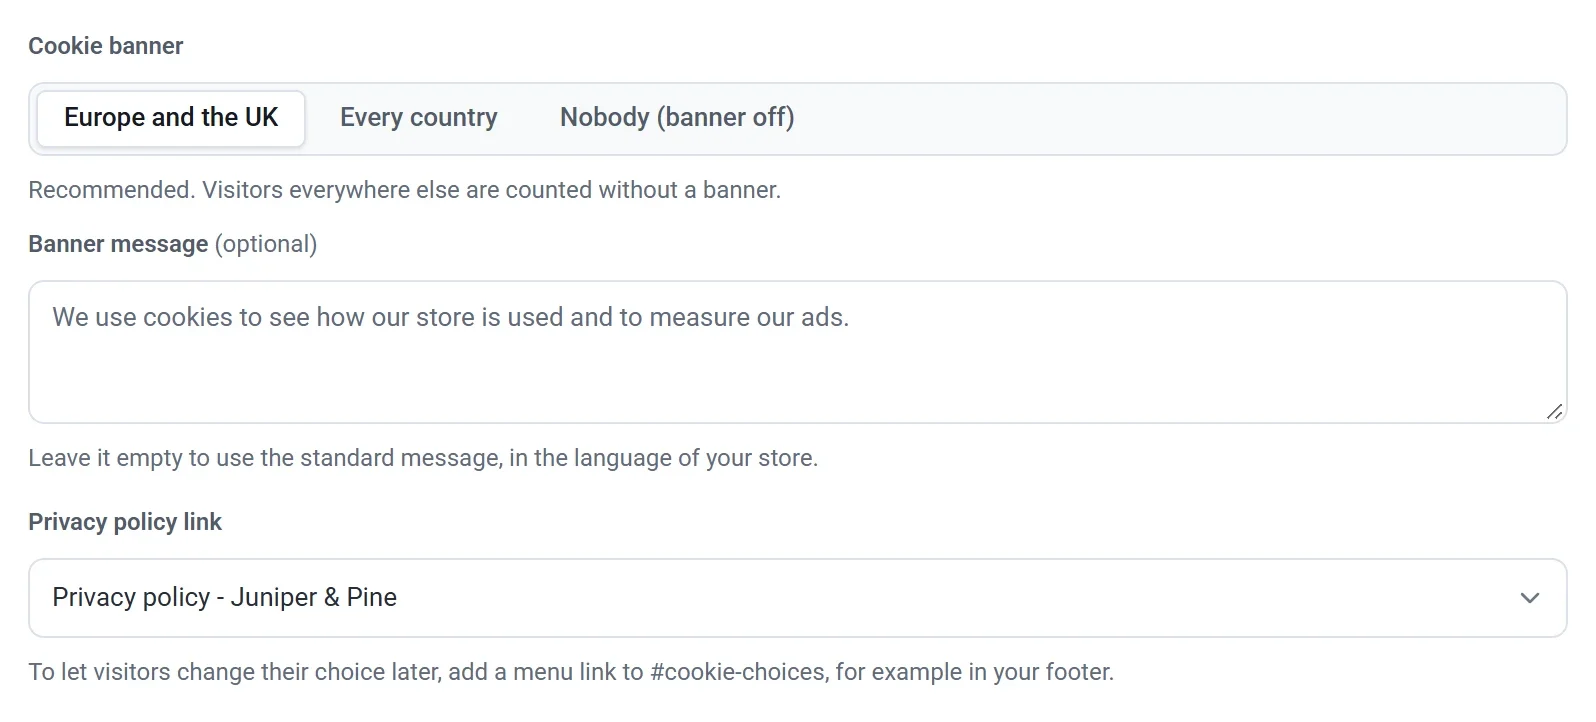
You can also change what the banner says:
- Banner message: type your own words, or leave it empty to use the standard message in your store's language.
- Privacy policy link: the page the banner links to. It starts on your Privacy policy page. Choose No link to leave it out.
The Accept and Decline buttons always look the same and are translated for you, so saying no is as easy as saying yes.
Visitors whose browser sends Global Privacy Control are not tracked unless they press Accept, whichever you choose.
To let visitors change their choice later, add a menu link to #cookie-choices, for example in your footer. Clicking it opens the banner again.